Spring - 5 스프링 DB접근 기술 (1)
해당 자료는 인프런 김영한님의 스프링 입문 - 코드로 배우는 스프링 부트, 웹MVC, DB 접근 기술 강의 노트입니다.
1. H2 데이터베이스 설치
개발이나 테스트 용도로 가볍고 편리한 DB, 웹화면 제공하는 H2 DB를 설치해야합니다. https://www.h2database.com 에서 windows Installer를 눌러 다운받습니다.
설치 경로로 갑니다. 보통 경로는 > C:\Program Files (x86)\H2\bin 입니다. 해당 경로에서 ‘h2w.bat’를 눌러서 DB를 켜줍니다. cmd에서 다음과 같이 명령어를 쳐줍니다.
1
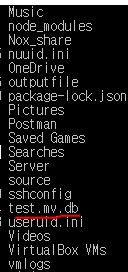
dir
여기서 test.mv.db 파일이 있으면 성공입니다.
누르게 되면 다음과 같은 화면이 나옵니다.
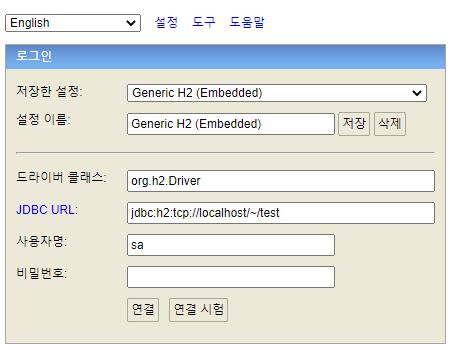
다음과 적어주고, 테이블을 만들어 줍니다.
1
2
3
4
5
6
7
drop table if exists member CASCADE;
create table member
(
 id bigint generated by default as identity,
 name varchar(255),
 primary key (id)
);
1
2
 insert into member(name) values('spring')
 select * from MEMBER
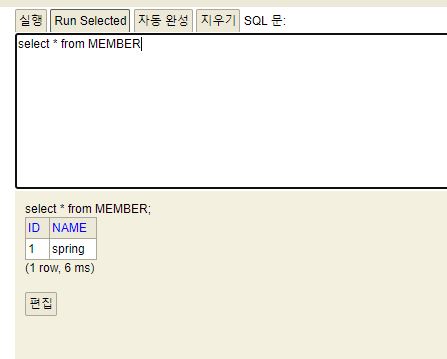
뜨면 성공입니다.
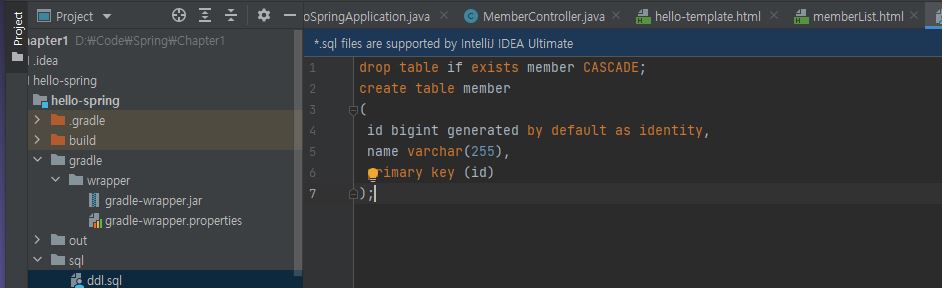
Intellij에서 다음과 같이 sql 디렉토리를 만들어주고 위의 코드를 넣어줍니다.
2. 20년대 방식 JDBC
순수 JDBC를 사용하기 위해서
build.gradle 파일에 jdbc,h2 데이터베이스 관련 라이브러리를 추가해야합니다.

1
2
implementation 'org.springframework.boot:spring-boot-starter-jdbc'
runtimeOnly 'com.h2database:h2'
그 다음 스프링 부트 데이터베이스 연결 설정을 추가해야합니다. resoruces/apllication.properties로 들어가
1
2
3
spring.datasource.url=jdbc:h2:tcp://localhost/~/test
spring.datasource.driver-class-name=org.h2.Driver
spring.datasource.username=sa
를 추가해야합니다.
그다음 repository 패키지에서 JdbcMemberRepository 파일을 만들어줍니다.
밑의 코드는 참고용으로 자세히 볼 필요는 없습니다.
만약 데이터베이스를 바꿀 일이 생기면 밑의 코드들을 수정해야한다는 불편한 점이 있다는 것입니다.
1
2
3
4
5
6
7
8
9
10
11
12
13
14
15
16
17
18
19
20
21
22
23
24
25
26
27
28
29
30
31
32
33
34
35
36
37
38
39
40
41
42
43
44
45
46
47
48
49
50
51
52
53
54
55
56
57
58
59
60
61
62
63
64
65
66
67
68
69
70
71
72
73
74
75
76
77
78
79
80
81
82
83
84
85
86
87
88
89
90
91
92
93
94
95
96
97
98
99
100
101
102
103
104
105
106
107
108
109
110
111
112
113
114
115
116
117
118
119
120
121
122
123
124
125
126
127
128
129
130
131
132
133
134
135
136
137
138
139
140
141
142
143
144
145
146
147
148
149
150
151
152
153
154
155
156
157
158
159
160
161
162
163
package hello.hellospring.repository;
import hello.hellospring.domain.Member;
import org.springframework.jdbc.datasource.DataSourceUtils;
import javax.sql.DataSource;
import java.sql.*;
import java.util.ArrayList;
import java.util.List;
import java.util.Optional;
public class JdbcMemberRepository implements MemberRepository {
    private final DataSource dataSource;
    public JdbcMemberRepository(DataSource dataSource) {
        this.dataSource = dataSource;
    }
    @Override
    public Member save(Member member) {
        String sql = "insert into member(name) values(?)";

        Connection conn = null;
        PreparedStatement pstmt = null;
        //ResultSet은 결과를 받음.
        ResultSet rs = null;

        //try catch문이 굉장히 많다.
        try {
            conn = getConnection();
            //Return~
            pstmt = conn.prepareStatement(sql, Statement.RETURN_GENERATED_KEYS);

            pstmt.setString(1, member.getName());
            //db에 실제 쿼리 보냄.
            pstmt.executeUpdate();
            //index키를 꺼내줌.
            rs = pstmt.getGeneratedKeys();

            if (rs.next()) {
                //값을 꺼내고 셋팅함.
                member.setId(rs.getLong(1));
            } else {
                throw new SQLException("id 조회 실패");
            }
            return member;
        } catch (Exception e) {
            throw new IllegalStateException(e);
        } finally {
            close(conn, pstmt, rs);
        }
    }
    @Override
    public Optional<Member> findById(Long id) {
        String sql = "select * from member where id = ?";

        Connection conn = null;
        PreparedStatement pstmt = null;
        ResultSet rs = null;

        try {
            conn = getConnection();
            pstmt = conn.prepareStatement(sql);
            pstmt.setLong(1, id);

            rs = pstmt.executeQuery();

            if(rs.next()) {
                Member member = new Member();
                member.setId(rs.getLong("id"));
                member.setName(rs.getString("name"));
                return Optional.of(member);
            } else {
                return Optional.empty();
            }
        } catch (Exception e) {
            throw new IllegalStateException(e);
        } finally {
            close(conn, pstmt, rs);
        }
    }
    @Override
    public List<Member> findAll() {
        String sql = "select * from member";

        Connection conn = null;
        PreparedStatement pstmt = null;
        ResultSet rs = null;

        try {
            conn = getConnection();
            pstmt = conn.prepareStatement(sql);
            rs = pstmt.executeQuery();
            List<Member> members = new ArrayList<>();
            while(rs.next()) {
                Member member = new Member();
                member.setId(rs.getLong("id"));
                member.setName(rs.getString("name"));
                members.add(member);
            }

            return members;
        } catch (Exception e) {
            throw new IllegalStateException(e);
        } finally {
            close(conn, pstmt, rs);
        }
    }
    @Override
    public Optional<Member> findByName(String name) {
        String sql = "select * from member where name = ?";

        Connection conn = null;
        PreparedStatement pstmt = null;
        ResultSet rs = null;

        try {
            conn = getConnection();
            pstmt = conn.prepareStatement(sql);
            pstmt.setString(1, name);
            rs = pstmt.executeQuery();

            if(rs.next()) {
                Member member = new Member();
                member.setId(rs.getLong("id"));
                member.setName(rs.getString("name"));
                return Optional.of(member);
            }
            return Optional.empty();
        } catch (Exception e) {
            throw new IllegalStateException(e);
        } finally {
            close(conn, pstmt, rs);
        }
    }
    //DataSourceUtils를 사용해야함.
    private Connection getConnection() {
        return DataSourceUtils.getConnection(dataSource);
    }
    private void close(Connection conn, PreparedStatement pstmt, ResultSet rs)
    {
        try {
            if (rs != null) {
                rs.close();
            }
        } catch (SQLException e) {
            e.printStackTrace();
        }
        try {
            if (pstmt != null) {
                pstmt.close();
            }
        } catch (SQLException e) {
            e.printStackTrace();
        }
        try {
            if (conn != null) {
                close(conn);
            }
        } catch (SQLException e) {
            e.printStackTrace();
        }
    }
    //닫을 때에도 DataSourceUtils를 사용해야한다.
    private void close(Connection conn) throws SQLException {
        DataSourceUtils.releaseConnection(conn, dataSource);
    }
}
Spring을 이용해보는 방법입니다. SpringConfig을 다음과 같이 수정해줍니다.
1
2
3
4
5
6
7
8
9
10
11
12
13
14
15
16
17
18
19
20
21
22
23
24
25
26
27
28
29
30
31
package hello.hellospring.service;

import hello.hellospring.repository.JdbcMemberRepository;
import hello.hellospring.repository.MemberRepository;
import org.springframework.beans.factory.annotation.Autowired;
import org.springframework.context.annotation.Bean;
import org.springframework.context.annotation.Configuration;

import javax.sql.DataSource;

@Configuration
public class SpringConfig {

    private final DataSource dataSoruce;

    @Autowired
    public SpringConfig(DataSource dataSource){
        this.dataSoruce = dataSource;
    }
    @Bean
    public MemberService memberService(){
        return new MemberService(memberRepositroy());
    }

    @Bean
    public MemberRepository memberRepositroy(){
        //return new MemoryMemberRepository();
        return new JdbcMemberRepository(dataSoruce);
    }
}
이것을 넣어줍니다.
이제는 DB객체를 바꿔줄 땐 저 소스들만 수정하면 되게됩니다. 자세한 설명은 제가 좀 더 공부해서 나중에 추가하겠습니다.
넣어준 다음 실행을 친행하게 되면,
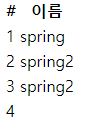
웹사이트
DB
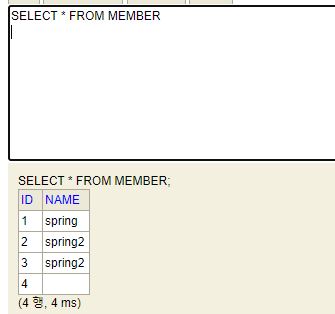 이런식으로 동일하게 뜨게되면 성공입니다.