Spring - 1 hello spring만들기
해당 자료는 인프런 김영한님의 스프링 입문 - 코드로 배우는 스프링 부트, 웹MVC, DB 접근 기술 강의 노트입니다.
1. Hello 만들기
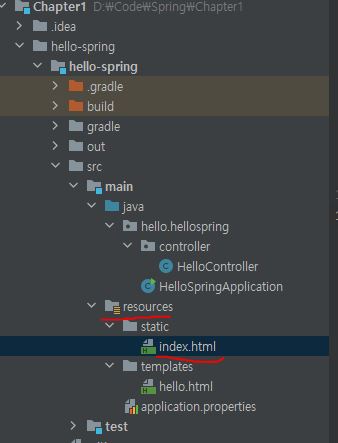
위의 사진과 같이 해당 경로에 들어가서 index.html을 만들어줍니다. 만드는 방법은 static폴더 위에 마우스 오른쪽 클릭 후 new-> html file을 눌러주시면 됩니다.
그 다음 해당 index.html에 다음 코드를 넣습니다.
1
2
3
4
5
6
7
8
9
10
11
12
<!DOCTYPE HTML>
<html>
<head>
    <title>Hello</title>
    <meta http-equiv="Content-Type" content="text/html; charset=UTF-8" />
</head>
<body>
Hello
<a href="/hello">hello</a>
</body>
</html>
그 다음 <localhost:8080>에서 결과를 보면 다음과 같이 뜰 것입니다.
하지만 이것은 정적 사이트로 이미 작성된 페이지를 뿌려주는 형태라고 생각하시면 됩니다.
다음은 컨트롤러를 만들어보겠습니다.
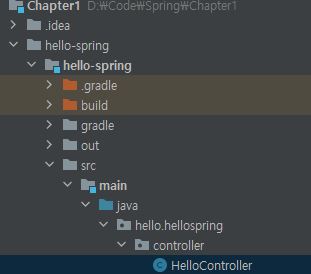
해당 경로에 controller라는 package를 만들어주고 HelloController라는 java 파일을 만들어줍니다.
1
2
3
4
5
6
7
8
9
10
11
12
13
14
15
16
package hello.hellospring.controller;

import org.springframework.stereotype.Controller;
import org.springframework.ui.Model;
import org.springframework.web.bind.annotation.GetMapping;

@Controller
public class HelloController {

    @GetMapping("hello")
    public String hello(Model model){
        model.addAttribute("data","hello!!");
        return "hello";
    }
}
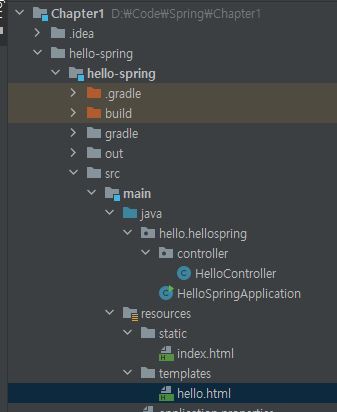
다음 코드를 작성해주시고, 다음 경로에 hello.html을 만들어줍니다.
다음
1
2
3
4
5
6
7
8
9
10
<!DOCTYPE HTML>
<html xmlns:th="http://www.thymeleaf.org">
<head>
    <title>Hello</title>
    <meta http-equiv="Content-Type" content="text/html; charset=UTF-8" />
</head>
<body>
<p th:text="'안녕하세요. ' + ${data}" >안녕하세요. 손님</p>
</body>
</html>
코드를 작성해줍니다.
다음 http://localhost:8080/hello에 들어가면
여기에서의 동작방식은 다음과 같습니다.
웹 브라우저에서 해당 URL(~~/hello)로 요청이 오면 저희가 작성한 Controller에서 hello로 작성된 함수를 찾고,
파라미터에 있는 Model이라는 것에 data가 hello인 값을 넣어줍니다. 그리고 return hello를 해주는데, 이 hello는 hello.html을 찾기위한 리턴 값입니다.
스프링 부트의 viewResolver는 hello.html에 model의 data의 키값인 hello를 넘겨주어서 ‘안녕하세요. + hello’가 출력되게 합니다.
2. window에서 build하기
서버에 배포하는 방법입니다.
먼저 cmd를 킵니다. gradlew.bat이라는 파일이 있는 폴더로 ‘cd’ 명령어를 통해 이동합니다.

다음 명령어를 쳐줍니다.
1
2
gradlew
gradlew build
다음 폴더를 확인합니다.
build -> libs 에 들어가시면 ‘해당 프로젝트 파일이름-SNAPSHOT.jar’를 볼 수 있습니다.
해당 파일을 서버에서 압축풀기를 해주면 배포가 완료된 것입니다.


